SHOP
3 min read

HP Multi Jet Fusion 5200: Predictable Manufacturing

By Mark Blumreiter on Sep 6, 2019 12:52:00 PM

A manufacturing process needs to be predictable if it is to be trusted with “money making” parts. True manufacturing has stricter requirements than prototyping in terms of predictability. This is one (of many) reasons 3D printing has struggled to break into the production space. HP’s new MJF 5200 3D printer is a new and improved version of their MJF 4200, which launched about 3 years ago. Most of the improvements in the 5200 are directly targeting production work by addressing print speed, part cost, part quality, and machine reliability.

This article takes a look at how the HP MJF 5200 improves on both part quality and machine reliability to achieve greater manufacturing predictability. When we say “part quality”, we are referring to all aspects of the final printed part; accuracy, repeatability, surface finish, strength, uniformity. When we say “machine reliability”, we are referring to the printer itself. How will one build differ from the next? How often will it break down or have a failed build? Can the machine be relied on 24/7/365 to sustain a business?

Improvements in Part Quality
The HP 5200 can achieve IT=13 tolerances (accuracy) with a CpK of 1.33 (repeatability). This is comparable to soft mold tooling.

These improvements primarily come from HP’s new “Process Control Software”. The new software takes into account machine specific parameters when processing the build file. It uses calibration data specific to the printer to scale and compensate part geometry accordingly. The 5200 now processes and “slices” the build file internally, instead of with external “one size fits all” software.

The HP 5200 also has a much higher resolution thermal camera and a greater number of heating lamps, both of which are located centrally above the build volume on the hood of the printer. After each layer the camera takes a thermal snapshot of the surface temperature. It uses this as feedback for the lamps to deliver the proper amount of energy to each specific “heating zone”. The HP 5200 has 5120 pixel thermal camera resolution vs. 992 pixel resolution on the HP 4200 (5x improvement). This gives the printer the ability to detect more minute temperature variations.

The thermal camera is surrounded by 22 heating lamps with 14 distinct control zones (The HP 4200 only has 20 lamps with 12 control zones) This increased lamp and zone number tie in with the improved thermal camera resolution to carefully control the surface temperature of the build, layer-by-layer.

The MJF process is driven by temperature control and the amount of energy required to melt powder. This is why these improvements are so critical to achieving better tolerances and repeatable builds.

Improvements in Machine Reliability

When a machine goes down in a production environment, it is immediately costing the company money by not producing. The HP MJF 5200 has multiple design changes to improve overall reliability.

A third fusing lamp was added for redundancy. Only two are required at any time. If a lamp dies mid-print, the 3rd lamp kicks in immediately and the build continues. Once the print is complete, the dead lamp needs to be replaced.

The heating lamps are also higher powered lamps. During normal operation, these are now running around 50% power, as opposed to near 100%. This allows more throttle-up and throttle down capability, and less on/off operation. This extends the overall life of the heating lamps.

Temperature control is a critical aspect in the Multi-Jet Fusion process. Because of this, the printer’s surrounding environment can play a role in build-to-build consistency. The 5200 printer has improved seals, fans, and sensors to prevent pressure/suction variations in the environment impacting the airflow and powder internally. The incoming air is also preheated to 40°C to further reduce potential failures or variability.

Finally, one area of manufacturing predictability we haven’t touched on, and may be the most important, is the cost of manufacturing.  The HP 5200 improvements in hardware and software lead to a more accurate picture of overall cost. Software can track consumable usage (variable costs) and the reliable machine can predictably build in the cost of maintenance items and service contracts (fixed costs) into your process.

The HP Multi-Jet Fusion 5200 3D printer is the latest advancement in additive manufacturing. It’s a great push in the right direction towards true production 3D printing. These improvements in part quality, machine reliability, and predictable cost structures will certainly open up more applications to use this technology.

Topics: 3D Printing
7 min read

What are the primary 3D print plastic technologies?

By Jim Hill on Sep 6, 2019 12:14:21 PM

What are the primary 3D plastic print technologies available and how does HP’s new multi jet fusion technology stack up?

Having worked in the 3D print industry in a part sales role and equipment sales role for 7 years, I have been asked many times by engineers and non-engineers what are the technologies used for 3D printing plastic type objects and what materials are used. Most recently, many people also ask me about HP’s technology since they are the largest player ever to enter the 3D print market.

In my opinion, the immediate challenge I see for newcomers to 3D printing is distinguishing between the different processes and materials available.

It can be pretty confusing. There are many different acronyms so the first thing to understand is that 3D printing is actually an umbrella term that encompasses a group of different 3D printing processes. It’s important to first understand the various technologies.

In this post we are going to look at what each primary type of 3D printing is such as: SLA, FDM, SLS, DLP, Material jetting and the newest technology MJF by HP.

SLA: Stereolithography Apparatus
I am beginning with this technology since SLA holds the historical distinction of being the world’s first 3D printing technology.  Chuck Hull is the inventor of SLA (1986) and founded 3D Systems one of the largest players in 3D printing. On a side note, I have had the pleasure of meeting Chuck Hull on several occasions and have to admit he is the humblest person I have ever met considering he is credited with starting the whole 3D print industry. 

I will try to put things in laymen’s terms, but this is a technical industry so there will be some technical terms and explanations used.

An SLA printer uses mirrors known as galvanometers or galvos, with one positioned on the X-axis and another on the Y-axis. These galvos rapidly aim a laser beam across a vat of resin, selectively curing and solidifying a cross-section of the object inside this build area, building it up layer by layer.

When the process starts, the laser “draws” the first layer of the print into the photosensitive resin. Wherever the laser hits, the liquid solidifies. The laser is directed to the appropriate coordinates by a computer-controlled mirror.

At this point, it’s worth mentioning that most desktop SLA printers work upside-down. That is, the laser is pointed up to the build platform, which starts low and is incrementally raised.

After the first layer, the platform is raised according to the layer thickness (typically about 0.1 mm) and the additional resin is allowed to flow below the already-printed portion. The laser then solidifies the next cross-section, and the process is repeated until the whole part is complete. The resin that is not touched by the laser remains in the vat and can be reused.

Post-Processing

After finishing the material polymerization, the platform rises out of the tank and the excess resin is drained. At the end of the process, the model is removed from the platform, washed of excess resin, and then placed in a UV oven for final curing. Post-print curing enables objects to reach the highest possible strength and become more stable.


FDM: Fused Deposition Modeling
This is also known generically as material extrusion and these devices are the most commonly available — and the cheapest — types of 3D printing technology in the world.

The way it works is that a spool of filament is loaded into the 3D printer and fed through to a printer nozzle in the extrusion head. The printer nozzle is heated to a desired temperature, whereupon a motor pushes the filament through the heated nozzle, causing it to melt.

The printer then moves the extrusion head along specified coordinates, laying down the molten material onto the build plate where it cools down and solidifies.

Once a layer is complete, the printer proceeds to lay down another layer. This process of printing cross-sections is repeated, building layer-upon-layer, until the object is fully formed.

Depending on the geometry of the object, it is sometimes necessary to add support structures, for example if a model has steep overhanging parts.


SLS:  Selective Laser Sintering or Powder Bed Fusion
Powder Bed Fusion is a 3D printing process where a thermal energy source will selectively induce fusion between powder particles inside a build area to create a solid object.

Many Powder Bed Fusion devices also employ a mechanism for applying and smoothing powder simultaneous to an object being fabricated, so that the final item is encased and supported in unused powder.

Creating an object with Powder Bed Fusion technology and polymer powder is generally known as Selective Laser Sintering (SLS).

How it works, again I am going to get technical.

First, a bin of polymer powder is heated to a temperature just below the polymer’s melting point. Next, a recoating blade or wiper deposits a very thin layer of the powdered material — typically 0.1 mm thick — onto a build platform.

A CO2 laser beam then begins to scan the surface. The laser will selectively sinter the powder and solidify a cross-section of the object. Just like SLA, the laser is focused on the correct location by a pair of galvos.

When the entire cross-section is scanned, the build platform will move down one-layer thickness in height. The recoating blade deposits a fresh layer of powder on top of the recently scanned layer, and the laser will sinter the next cross-section of the object onto the previously solidified cross-sections.

These steps are repeated until all objects are fully manufactured. Powder which hasn’t been sintered remains in place to support the object that has, which eliminates the need for support structures.


DLP: Digital Light Processing
Looking at Digital Light Processing machines, these types of 3D printing technology are almost the same as SLA. The key difference is that DLP uses a digital light projector to flash a single image of each layer all at once (or multiple flashes for larger parts).

Because the projector is a digital screen, the image of each layer is composed of square pixels, resulting in a layer formed from small rectangular blocks called voxels.

DLP can achieve faster print times compared to SLA. That’s because an entire layer is exposed all at once, rather than tracing the cross-sectional area with the point of a laser.

Light is projected onto the resin using light-emitting diode (LED) screens or a UV light source (lamp) that is directed to the build surface by a Digital Micro Mirror Device (DMD).

A DMD is an array of micro-mirrors that control where light is projected and generate the light-pattern on the build surface.


MJ: Material Jetting (commonly known also as Polyjet)
Material Jetting (MJ) works in a similar way to a standard inkjet printer. The key difference is that, instead of printing a single layer of ink, multiple layers are built upon each other to create a solid part.

The print head jets hundreds of tiny droplets of photopolymer and then cures/solidifies them using an ultraviolet (UV) light. After one layer has been deposited and cured, the build platform is lowered down one-layer thickness and the process is repeated to build up a 3D object.

MJ is different from other types of 3D printing technology that deposit, sinter or cure build material using point-wise deposition. Instead of using a single point to follow a path which outlines the cross-sectional area of a layer, MJ machines deposit build material in a rapid, line-wise fashion.

The advantage of line-wise deposition is that MJ printers are able to fabricate multiple objects in a single line with no impact on build speed. So long as models are correctly arranged, and the space within each build line is optimized, MJ is able to produce parts at a speedier pace than other types of 3D printer.

Objects made with MJ require support, which are printed simultaneously during the build from a dissolvable material that’s removed during the post-processing stage. MJ is one of the only types of 3D printing technology to offer objects made from multi-material printing and full-color.


MJF:    Multi Jet Fusion Technology
MJF does laser based powder bed printing one better and it’s a natural move for HP to improve on powder based printing with its heavy-duty 2D printing know-how. The new process has the speed and technologies of a printing press, as its print head and heater arms sweep across the full print area for each layer of the part.

Like binder jetting, MJF uses inkjet printing to define part geometry, but then it diverges in how it fuses the powder into a part. Each fraction of a millimeter layer is created with three steps:

  1. A layer of powder is spread across the bed.
  2. Inkjet print heads sweep across the powder, depositing millions of drops of light-absorbing ink called fusing agents. These define which voxels to keep and which will fall away as powder. Additional inks called detailing agents help mark a crisp part boundary and can provide other properties, including color.
  3. An infrared heater sweeps across the bed. The ink-marked areas absorb enough of the IR energy to sinter to the underlying part, and the rest remains as full-color powder.

I have to admit having been in the industry since 2012, MJF is my personal favorite technology because it answers so many manufacturing needs from prototyping to production. It was introduced to the market about 3 years ago by Hewlett-Packard.  MJF is helping company’s cut their time to market and reduce product development costs.  Often it’s also utilized to reduce tooling cost.  No other technology offers the array or various advantages to that of MJF.

What are some of HP’s MJF Advantaged?

  • Builds on the advantages of powder bed 3D printing for industrial use.
  • Offers the lowest part cost of any 3D printing technology.
  • Produces high-quality parts.
  • Eliminates manual steps and scales for small production runs.
  • Offers the flexibility of fusion and detailing agents to add new material properties.
  • Brings the name recognition and manufacturing clout of HP to 3D printing.
  • Introduces HP’s Open Platform for new material certification.

MJF is already supported by a range of printers. This includes the color-capable HP 300/500 series as well as the production-scale 4200 printer.  Recently HP introduced the injection mold quality 5200 series 3D printer. Lastly, with HP’s recent release of a binder jetting metal printer (Metal Jet) they are making it clear that MJF is part of larger HP strategy for additive manufacturing. The era of supposed 3D printing hype is over… the additive era of manufacturing is here.

Given that these machines are targeted at industries, it’s not unusual that you wouldn’t have access to one.  However, HP’s initial success has been with 3D print service providers who may offer what you need to get your production going.  Often a first step is to utilize a service provider before implementing a unit in house. 

The above are just some of the reasons why I believe HP’s MJF technology is my personal favorite 3D print technology.


Topics: 3D Printing
2 min read

Is resolution important when exporting to a .STL 3D printing file?

By Gene Call on Sep 4, 2019 2:26:25 PM

When I hear a client say they are just not getting the quality parts they need from their 3D printer, I wonder how the 3D model was created, what resolution the model export was set at and what type of 3D printer the part was printed on.

Today I am going to talk about the STL file format and why resolution matters.

The STL file format is the most widely used file format for 3D printing. There is some debate on where STL extension came from - some sources say STL stands for Stereolithography and others say it stands for standard triangle language. What is important is that the STL file is the most commonly used format in 3D printing today. Another key point is most 3D CAD programs have the ability to export to a STL file. The STL format is the connection between the 3D model and your 3D printer.  An STL file eliminates the need for interpreting various CAD file formats and provides a consistent 3D print format for print manufacturers to work with. The STL file is imported into a 3D print manager software where the 3D model is sliced into hundreds or thousands of layers and sent to your 3D printer. You can think of the STL file as the interface between your 3D model and the 3D printer.

Why is the STL file resolution so important in producing a good 3D printed part?

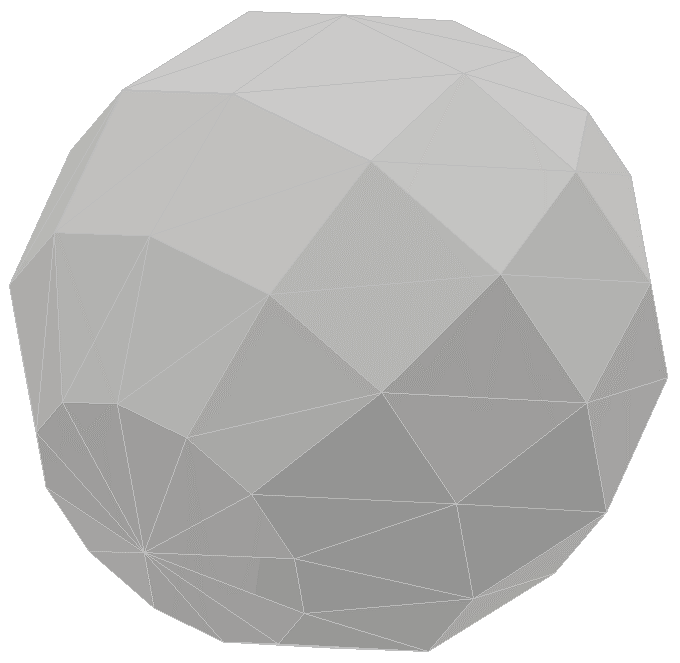
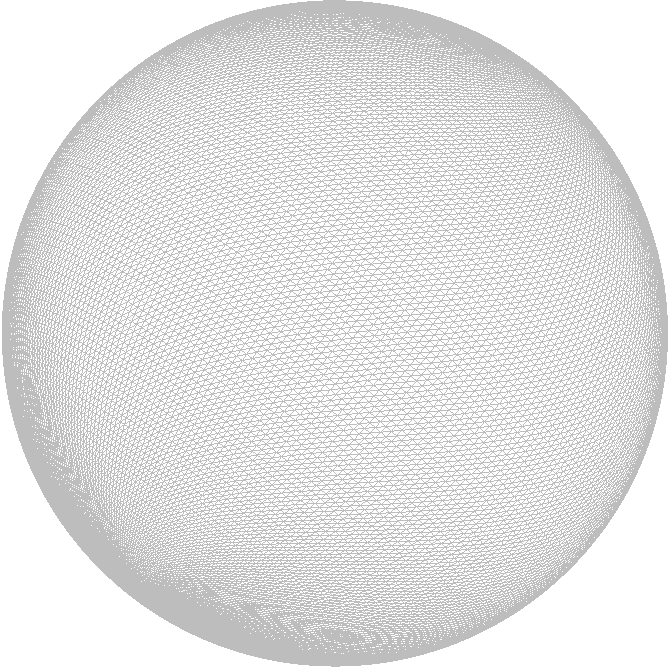
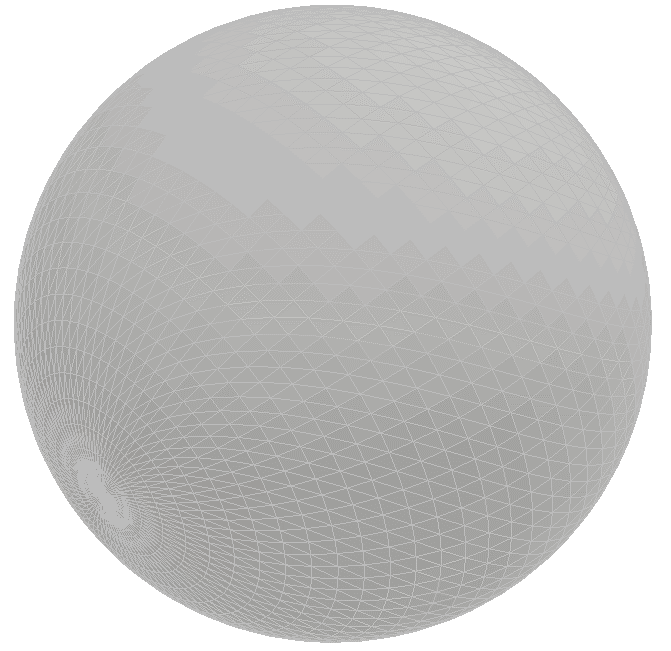
The STL file is a data format file that uses linked triangles to create a surface geometry of a solid model. The higher the resolution, the smaller the triangles, meaning more triangles will be used to create the surface of your 3D model showing greater detail. Too low of a resolution will mean larger triangles creating less detail on the surface of your model.  

res1 res2 res3


Two things to consider when exporting to a STL file:

  1. Too high of a resolution will create a large file size making it hard to upload and send to others on your team. It can also create such fine detail that your 3D printer cannot print (remember more triangles create a larger file).
  2. Too low of a resolution will lead to your 3D part not printing a smooth surface, good angels or clean curves. We often find clients think their printer is not outputting fine enough detail when in fact, it’s the print file resolution.

Beyond resolution, there are other things to look at when exporting your 3D modeling software to a STL file are:

  1. Cord Height: The maximum distance from the surface of the original 3D model to the STL Mesh.
  2. Wall thickness: This is the distance between one surface of your model and its opposite side surface.
  3. Angle tolerance: sets the angle between the normal's of adjacent triangles.

It is also important to know what type of 3D printer you are going to be sending the file to; for example, FDM, SLA, SLS or MJF to name a few. Know your technology and what type of detail and smoothness it has the ability to print.  This will help determine your resolution choice.

In conclusion it is important to set the right resolution of the STL file for your 3D printer. If the STL file resolution is sent too high or too low, it could result in the 3D printed part not meeting your specification or needs.


Topics: 3D Printing
2 min read

Is HP changing the world of 3D printing?

By Jim Hill on Aug 30, 2019 3:27:45 PM

To answer this question, I have to go back a few years when they first entered the Additive Manufacturing space.  I was working in the 3D print arena for a different 3D print manufacturer during the spring of 2016 when rumors were rampant of HP getting into the 3D print industry. The industry was speculating two things – one that they were going to buy an existing 3D print technology company or two they would develop their own 3D print technology based off of existing technologies. In the end, they actually developed their own new technology to take the 3D printer a huge step forward. The technology is known as Multi Jet Fusion (MJF).  During a large 3D print related trade show (rapid+tct), HP introduced MJF on a series of YouTube videos showing the process at work.  Did it cause a stir at rapid+tct?  The answer is yes it certainly did. And this from an industry that has seen its share of over hyped technologies.  It’s also important to remember the core technologies at the time were FDM, SLA, SLS and a few other jetting based technologies.  The common theme with all 3D print technologies at the time was one off, tracing type processes that produced good detailed parts but lacked the ability to run volume. 

Here is where HP changed the world of 3D printing: They had developed a process using a power bed system (eliminates support structures) using fusing agents to produce final use nylon parts (true fused and functional parts).   Although the powder bed concept was not new, several manufacturers were already using a powder bed system (namely SLS Selective Laser Sintering), the significant difference is HP is not using a laser.  Remember, as I mentioned before, the SLS process utilizes a laser tracing technology to solidify parts.  The laser can only go so fast – throughput is limited.   HP utilizes a one pass fusing system that jets fusing agents to form the parts in layers. The jetting agents are not used to form a chemical bonded part but to truly fuse parts.  The other critical advancement, HP developed a detailing agent (jetted in the same one pass) that stops the fusing process to limit thermal bleed.   Basically, the MJF process spreads powder in a thin layer, the fusing agent is laid down by HP’s patented print heads, an intense infrared light system activates the fusing agents to fuse the nylon plastic together.  With the detailing agent helping to create a crisp and definitive feature by stopping the fusing process.  The system prints one layer, one pass at a time to form very detailed and dense parts with no speed degradation no matter the volume of parts printed. 

This process also produces truly isotropic parts which means the part is as strong in the x and y as it is in the z. This jetting of fusing agents is ground breaking enough but when you look at the size of the print bed you will see that volume is another game changer.  The bed size of 13 inches in the x, 11.5 in the y and 15 inches in the z gives you a large volume to use. The print speed is approximately 1 inch per hour which allows fast complete builds.  Hundreds of parts can be produced all at the same time with precision accuracy – often this is 10-20X faster than previous technologies.  But that’s not all: HP recently introduced a new printer to their lineup that has the ability to print with a cpk level of 1.33 with an I.T. scale of 13. What does that mean? It means parts printed on an Hp 3D printer are equivalent to parts coming off soft steel injection mold tooling. 

Wow, that’s game changing.

Topics: 3D Printing
2 min read

Can you 3D print Fixtures and Grips effectively?

By Gene Call on Aug 30, 2019 2:54:29 PM

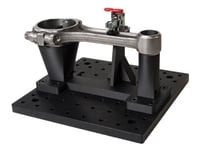
EndEffectorsI spend a lot of time calling on Machine shops and Manufacturers seeking to understand their thoughts on how 3D printing technology may be effecting their manufacturing workflows.  I will introduce myself and explain why I am calling which often leads to responses such as “I don’t see how we could use a 3D printer”, “we do not need a 3D printer’’, or “3D printing does not fit our processes”.   These are typical responses often based on past experiences with 3D printing when the technology was geared more towards prototyping versus final use parts.   Since I know often our clients past experience with additive manufacturing has been poor, I ask if they use fixtures or grips to focus more on the application, not 3D print technology.  Almost all of the time the answer is yes to one or the other. I then ask how they manufacture their fixtures or grips which leads to the traditional answers such as “we machine them in house “ or “we send out for them”.
Next I ask them how that process is working for them and I get responses such as “it ties up one of our CNC machines”, “it takes too long”, or “it is expensive”. This is a common theme – every business is now under pressure for faster time to market with less resources where utilization of equipment is at an all-time high. This is creating bottle necks and delays that impact their profitability. Fixtures and grips have traditionally been machined from steel or aluminum on CNC machines that take up valuable resources needed for production.  Many times these metal fixtures and grips are stronger than what they need to be, but using a CNC machine to manufacture the part was the easiest and most cost effective way to produce them.

This is where the conversation turns to 3D printers. Now I am not talking about hobby 3D printers. The printers I am talking about are commercial printers like Markforged, HP and Carbon to name a few. The plastics used in these printers are strong enough for most fixtures and/or grips and in some cases in-lay Carbon to add even more strength.  The real advantage of 3D print?  There is no machine set up or programming, just adding the print file to the build software and sending to the printer.  No question 3D printing is not for every application.  There are still advantages to traditional grips and fixtures such as material choices and strength. 

Here are a few advantages you should consider when looking at 3D printing fixtures and grips.

  1. Costs of materials – This is one of the biggest ROI’s vs. machined part.
  2. Reduce time to market - You can often cut the manufacturing time of fixtures down to hours versus days or a weeks to machine.
  3. Design Flexibility - The ability to create new designs not able to be produced in traditional ways.
  4. CNC Utilization - You can often free up your CNC machine for other projects.
  5. Fast Redesign - Designers have the ability to make changes fast and resend the print file to the printer.
  6. Reduced Waste - Less waste with 3D printing compared to machining a part.
  7. Material Options have expanded - Use of a wide variety of materials like plastics, and fibers such as fiberglass and carbon fiber to choose from to meet your requirements.

So if you are looking to improve your process, and save time and money on your fixtures and grips, take a look at the new 3D printers and what they have to offer.  The technology has evolved, cost of operation has lowered, and applications are expanding. 

Topics: 3D Printing
13 min read

22 Ways Manufacturers are using 3D Printing in their Business Today

By Mark Blumreiter on Aug 30, 2019 1:55:52 PM

3D Printing, also known as Additive Manufacturing, has been around since the mid 1980s. It was primarily used for high value prototyping, but in the past decade has grown dramatically. This was due in part to many more companies developing their own unique machine or print technology, and thus offering lower cost hardware, a wider array of material options, and printers built for specific applications.

For manufacturers, the 3D print applications are seemingly endless. The only reason a manufacturer of any size isn’t using 3D printing is either they don’t understand it, or they don’t know about it. If you fall in one of those categories, here are 22 ways manufacturers are using 3D printing in their business today.

  1. Test form, fit and function – Prototyping is the traditional use for additive manufacturing. Chances are, the 3D printed part will not be the same material as your production part. It won’t have the exact same surface finish, weight, or durability. But what it does have are the same approximate dimensions, and overall spacial representation of your production part… no machining or tooling required!  It’s much quicker and cheaper to 3D print your CAD file overnight to do a rough fit-up before cutting any metal.
  2.

HP Jet Fusion 3D Printed Part with PA12_Credits Needed_58Help Understand size/scale – If you’ve ever designed in CAD software, all parts look to be about 6-12” long… depending on the size of your computer monitor. That is the beauty of 3D CAD design – whether you are designing a skyscraper or a microchip, you can view your part at a comfortable scale. But once that part gets sent to the shop floor or 3D printer, it may shock you to see how big or small it really is. When I worked as a design engineer, I was always surprised at how small my parts ended up being. By 3D printing them before even machining a metal prototype, I was able to notice details like potential difficulties in assembling such a small piece.

  3. CNC fixture planning – Communication between the design engineers and machinists (or shop manager) is very important. One of the first steps to being a good designer is to understand the manufacturing process, and a big part of that is fixturing. Once the engineering drawing makes it to the shop floor, they need to figure out how to make the part. Sometimes designing and building fixtures can take weeks. Providing a 3D printed part to the machinists can help them plan their fixture technique and speed up the overall process. 
  4.

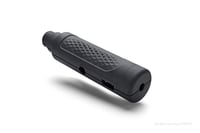
HP Jet Fusion 3D Printed Part with PA12GB_Credits Needed_71Feel ergonomics – Ergonomics (from the Greek word ergon meaning work, and nomoi meaning natural laws), is the science of refining the design of products to optimize them for human use.
Any component that a human needs to physically interact with requires some design consideration for how this interaction happens. Typically when we hear “ergonomics” we think of chairs or desks, but let’s not forget all handles, knobs, toys, remotes, furniture, tools, just about anything to do with an automobile… the list goes on. The best way to test the ergonomics of a design is to physically interact with it, and that is one thing a CAD visualization cannot provide. 3D printing provides a quick and effective way to hold a handle, for example, in your hands to see if it feels comfortable and usable. Pass the part around to multiple employees to get their feedback and suggestions. 

  5.

Shadow boxes – A shadow box provides a visual cue for where tools or components need to go. This is big for shops implementing lean manufacturing practices. In many cases, programming and machining a shadow box to the exact curves and angles of the tool/component placement is not worth the time or effort. 3D printing a shadow box from cheap plastic overnight with no operator supervision required makes more sense.

  6.

cmmCMM Fixtures – One of our best customers, an injection mold company in Wisconsin, 3D prints all their CMM fixtures. The fixtures are designed to match the exact contours and angles of the part so they fit perfect every time. They also design the part numbers right into each fixture, so when they need to use one, they have the fixtures arranged by part number on shelves. If and when a fixture wears out, they simply use the same print file to create another overnight. Their machinists no longer have to spend time machining aluminum CMM fixtures.
  7.

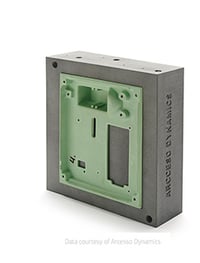
Reaction Injection Mold printed with HP Jet Fusion 3D 4200 and HP HR PA 12 - Data courtesy of Arcesso Dynamics_03Short run tooling for injection molding – Injection mold tooling might be the holy grail of 3D print applications. Hard steel molds are expensive and take weeks or months to machine. If there are design changes, you can multiply that timeline many times over. While a handful of companies are attempting the move to directly 3D print production parts, the reality is injection molding is (for now…) superior in terms of material options, surface finish, accuracy and repeatability. We now see company’s directly 3D printing short-run molds in both plastic and metal in a fraction of the time.  Even if there is clean-up machining or polishing required, it still drastically cuts down on the cost and time compared to traditional methods.
  8.

sales teamDemo pieces for the sales team – If a picture is worth 1,000 words then a physical model is worth 1 million. Giving the sales team a part to show off in meetings or pass around in a presentation, it makes their job of selling much easier. Presenting a physical prototype for a client to hold in their hands is better than almost any computer generated image. The sales team brings in the money for the company, which pays everyone’s salary… so give them the best tools possible!
  9. Low to mid-volume production parts – As mentioned previously, many companies are turning to additive manufacturing for their primary means of production. As printer technology improves and more materials become available, not only is the part quality good enough, but it makes financial sense. If the EAU is in the millions, injection molding is the way to go. But if we are in the 1,000s to 10,000s, depending on geometry, it can be a financially sound option. That’s not to mention design freedom (organic shapes, hollow parts, etc.), part customization, and on-the-fly design changes.
  10.

Validation before tooling investment – Imagine being a young engineer, designing your companies latest new product which happens to be a complex plastic part. You’ve finished the design and management is asking for the go-ahead to purchase the tooling for $60,000. You hope the design is perfect because if it needs a design change for whatever reason, they may have to remake the tooling which costs another $60k and 2 months. In 2019, 3D printing your plastic part before purchasing the tooling is a critical step in the design phase. Test as much as possible before investing in the tooling. Get every kink and potential failure point out of your design to ensure the maximum chances of success.

  11. Custom assembly tools – Whether it is a robot of human hands assembling parts, often times unique custom tools are required for the job. There could be a screw in a tight space, or an oddly shaped part that needs to be precisely placed. Similar to CMM fixtures, an assembly tool can be 3D printed to perfectly fit your part with its unique geometry. This is also another perfect example of something that is low volume (maybe only 1 or a handful are needed) and it’s not worth a machinist operators time to set up and machine an assembly tool using a mill or lathe. 3D printing is a great fit for custom one-off applications like assembly tools.

  12.

Space claim planning – Planning a new shop or office takes careful planning to ensure the space is both safe and efficient. 3D printing the footprint of each machine, desk, room, etc. allows a physical layout of the proposed idea. Decision makers can stand around the scale mode, physically move the pieces around, and discuss their options. This can be a more effective way than using a computer generated model on a computer screen in which one person has control, or emailing revisions back and forth.

  13. Trade show giveaways – While most companies wouldn’t give away their product or service for free at a trade show, a miniature of useful trinket can be a practical marketing piece. At MasterGraphics, we 3D print hundreds of bottle openers with our name on it. It serves multiple purposes. It shows off the strength, surface finish, and level of detail of our HP Multi Jet Fusion parts. It shows the ‘MasterGraphics’ name, so our customers remember who they got it from. Finally, the bottle opener is actually a useful for the prospect! Personally I keep mine with me on my keychain at all times, as it acts as a great conversation starter as well.

  14.

Fluid flow – One of the biggest benefits of additive technology is the design freedom to create complex geometry for free. By “free”, I mean that the 3D printer does not care what your design is, in the same way a paper printer doesn’t care how complex your words are. It just prints what it is told. Fluid flow (whether gas or liquid) is a very complex area of study, and one where “simple” is not always better. 3D printing can create fittings, ducts, and passageways with unique bends, curvature, and internal geometry that would otherwise be impossible to create. The benefits of this are to reduce fluid turbulence which causes noise, vibration, and system inefficiency. This is especially critical in the aerospace and automobile industry.

  15. Replacement machine components – Spare parts and replacement parts are a fast growing application for additive manufacturing. If a production machine goes down, you are losing money every minute and hour it sits idle. Sometimes waiting for a repair technician or replacement part is just not an option. By having a 3D printer on site, it can be ready to print any broken component immediately. One of our customers purchased a $500k+ metal 3D printer for that sole purpose. Their production machines were extremely old (80+ years) and the original tooling and drawings no longer existed. (or never did)  The potential loss in revenue from a broken machine was not worth the risk so they invested in a high end 3D printer to quickly address any needs.

  16.

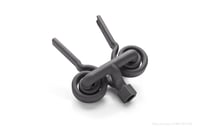
EndEffectorsRobotic Grippers/End Effectors – Assembly lines are becoming more automated due to lower cost, higher quality robots. The “end effector” is the modular “hand” at the end of the robot. The strength-to-weight ratio of the end effectors is very important because heavy grippers are more energy intensive to move, especially at high speeds. 3D printing is the perfect solution for robotics. 3D printed parts can be hollowed or printed with a lattice structure for weight reduction. They can also be printed with precise geometry for your application. Markforged makes 3D printers with continuous carbon fiber, Kevlar, or fiberglass capabilities to achieve an incredible strength-to-weight ratio.
  17. Print wear parts that have a lifecycle – Many parts have a planned lifecycle until they fail or are no longer effective. Additive manufacturing can provide on-demand replacement parts on an as-needed basis. No need to stock shelves full of minimum order quantities or keep shelves of “just in case” parts labeled and organized. Instead, build up a digital inventory of CAD files for your normal wear and tear parts, so a new part can be 3D printed the same day they are needed.

  18. Reduce inventory (print on demand) – Inventory can be a huge financial burden for manufacturers and OEMs. As mentioned in the previous section, 3D printing eliminates the need for minimum order quantities to sit on shelves for years. In many cases these stocks of inventory become obsolete, and end up as a financial write-off, with the parts headed for a landfill. “Industry 4.0” and “Digital Manufacturing” are becoming common terms. Replacing physical inventory with digital inventory is a main component of that.

  19.

New and unique design constraints – All manufacturing methods have design constraints, 3D printing included. CNC machining is constrained by the drills, mills, cutters, fixtures, and machine capabilities (3-axis, 5-axis, etc). Injection molding is constrained by die draw, press size, and wall thickness. Stamping, extruding, and forming each have their own constraints. 3D printing is just another tool in the manufacturing toolkit. It eliminates a vast majority of traditional design constraints, but we’re left with constraints such as overhang supports, print orientation, powder removal, and stair stepping, to name a few. Additive manufacturing opens up the possibility of organic shapes, topological/generative design, and mass customization.

  20. Service bureau for customers – Along with the numerous benefits already mentioned for manufacturers, providing 3D printing as a service for customers is a quick way to pay for your 3D printer purchase. There are so many different types of 3D printers for various applications, and no company can own them all. Many times a manufacturer will have a unique machine or material that someone else could benefit from. Typically this stems from sales demo pieces (#8), trade show giveaways (#13), or functional prototype testing (#1, #10). Once customers see your additive manufacturing capabilities, they will want to benefit from it as well on an as-needed basis.

  21. Take write off – The end of the fiscal year means the tax man comes knocking. Excess profits can be invested into additive manufacturing capabilities to grow your business and cut down on corporate taxes. With all the reasons listed here, it should be clear that a 3D printer, whether it’s $500 or $500,000, can be a solid financial investment to grow your business.

  22.

To say you have one! – This may not be the case anymore, but back in the early 2000s it was a big deal to tell your customers you owned a 3D printer. Some companies purchased one for their lobby to show how innovative and forward-thinking they were. In 2019, most manufacturers are using additive technology in some form, whether directly or indirectly. It is almost an expectation to have additive capabilities of some sort for quick prototyping, even if it’s a $300 hobbyist FDM machine from Amazon. It is so easily integrated with the near universal 3D CAD design programs used, there really is no reason not to be using additive in some form.


Feel free to contact me at Mark.Blumreiter@MasterGraphics.com or 414-559-360

Email Mark

Topics: 3D Printing
1 min read

MasterGraphics installs one of the first HP MJF 3D 5210 Printing Solutions

By Kevin Carr on Aug 29, 2019 11:54:11 AM

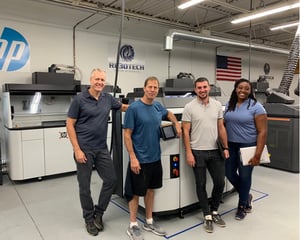
re3dtech-1MasterGraphics installs one of the first HP Multi Jet Fusion 5210 3D Printing Production  Solutions at Illinois based Service Provider RE3DTech.

Madison, Wis., August 13, 2019 – Last week, Re3DTech solidified its commitment to HP’s 3D print technology by adding the new HP Multi Jet Fusion (MJF) 5210 to its growing portfolio of HP 3D Printers. The Illinois based service provider has been a proponent of HP’s 3D print technology since its introduction three years ago. The 5210 installation compliments the multiple HP MJF 4210 and HP MJF 580 printing solutions already in place at Re3DTech.   Re3DTech has seen increased market demand in the mid to low volume production space since the inception of their business, which is built on HP’s MJF technology. The 5210 system builds off the core 4210 technology and adds software and print technology that brings traditional manufacturing practices and standards to additive manufacturing. These enhancements ensure repeatable and predictable results.  

Kevin Carr, President of MasterGraphics, explains “the capabilities of the HP MJF 5210 are game-changing. This new technology creates more scenarios where it is cost-effective to utilize additive manufacturing versus traditional manufacturing processes such as injection molding. As the market is changing and adapting to new 3D print technologies, digital manufacturing is a term we continue to hear more and more. Manufacturers want to be more innovative, cost-effective, and quicker to market. The HP MJF 5210 helps enable achieving these goals. We have seen a more flexible manufacturing process and reduction in overall inventory to produce specifically what you need.”

“We see clients such as Re3DTech not as a service bureau but as a manufacturing hub. We are at a true tipping point where innovators such as HP are providing technologies that production houses like Re3DTech are building businesses on by providing unique and cost effective manufactured goods”, says Carr.

Learn more about Re3dTech.


Topics: 3D Printing
2 min read

3D WOW on Steroids

By Kevin Carr on Aug 28, 2019 12:54:55 PM

HP Jet Fusion 3D Printed Color Design with PA12_12HP recently announced their new, sub-$100k, 500 series of 3D printers utilizing their innovative MJF (Multi Jet Fusion) 3D print technology. This is the same technology being used in HP’s revolutionary 4200 production-level 3D printers that were released in 2017. I should also note that HP MJF uses HP PageWide print head technology, which is also used in their 2D line of printers.

The 500 series of HP’s first expansion of their portfolio, at a lower acquisition price, and in the case of the 580, the ability to print true color. These are all-in-one systems, that produce nylon plastic white parts (HP 540), or full color (HP 580). For those familiar with traditional SLS, let me just repeat, these are all-in-one systems. Both printing and processing are contained in a single unit.

HP is positioning these units to not only produce traditional prototypes, but also short run production parts. While the HP 4200 is slotted for full production, the 500 series is intended to provide ramp-up capability for 3D print production.

The color technology integrated in the 580 is attracting most of the attention and, yes, although certainly industry changing, I believe the market is missing what the non-color version actually provides. Let me explain…

The base 540 systems starts below $90k and, although it does not offer color output, it prints utilizing HP’s Multi-Jet Technology. MJF melts PA12 nylon material, which on the 540, results in a smooth, white finish for outstanding visual appeal. More importantly, these are truly functional parts. In fact, I often refer to HP’s MJF technology as SLS (Selective Laser Sintering) on steroids. SLS has been the standard for high quality, durable parts and HP has created a process to increase productivity – up to 15 times faster – with less waste. Historically, SLS systems were north of $250k. In addition, you had to set up special environments and have highly trained operators. The HP 540 system is completely self-contained, office-friendly and easy to use.

In the past, our clients have spent more than $100k on 3D printers to produce prototypes; 3DS Projet 3500 for example; that were slow and expensive to run. Now, with the HP 540, you can make a similar investment and get the returns that, in the past, were only possible on systems costing well over $350k.

Our client’s previous investments around 3D printing clearly offered business advantages and financial returns but, with this new 500 series, offers a return on investment – also steriod size.

As a manufacturer, product designer, etc., this new printer truly offers a new way to be more innovative and get to market even faster. How fast? Within 24 hours you now have the ability to produce an end-use part – not just a prototype. Our smaller clients can compete with larger ones – in fact in most cases they are able to implement the process changes faster – this is the world we are living in.

In the past 18 months – we have helped two startup companies leverage HP Technology to create brand new businesses that are thriving.

I encourage you to look at the new HP 500 series 3D printers – look past the cool factor – and at the true design/manufacturing capabilities possible. we are in a Manufacturing revolution and HP has now provided a unique tool to help you be more competitive. Let’s build the future of manufacturing in the U.S. We are excited to have one of the first 500 series units installed at our facility and invite all to come visit.


Topics: 3D Printing
2 min read

HP’s Color 3D Printer will be a Good Fit For Wide Segments Of Manufacturing

By Kevin Carr on Aug 28, 2019 11:02:09 AM

Admittedly, Zprinters produced good quality color models for marketing or design concepts. They made a big impact on product development for consumer products like toys, hand tools and items where the visual appeal was just as important as functionality. The problem though, was the models were limited in their use. They couldn’t reliably be used for fit or function because they basically consisted of glued drywall powder. This made the parts fragile, heavy and brittle.

Conversely, HP’s Jet Fusion output is engineering-grade thermoplastic. The parts are actually created from fused (melted) plastic using the same process as the current production-focused HP 4200 3D printer. Currently, the color material is Nylon PA 12, which is a very durable, rigid plastic. And, parts printed on the HP Jet Fusion are extremely precise – very similar to SLS units costing over $350k.

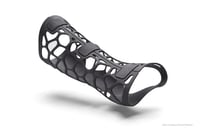
The HP Jet Fusion 580 | 380 print in full color so they can be used for marketing or concept models. But, think bigger picture here. Think end-use parts like prosthetic devices, CMM fixtures for inspection, or labeling for unique customization per part.

Let’s look at CMM (coordinate measuring machine) fixtures as an example. The CMM measures the geometry of objects using a probe. It’s supports are traditionally manufactured using CNC machining and multiple iterations are usually created because the measured object might change during the design phase.

The CMM Fixture holding the the object needs to be precise and durable as aluminum. Typically, they will have labels and coded supports added for the inspecting engineer to know tolerances, dimensions and other important specs to make sure the inspected part being held by the CMM fixture matches the required geometry.

Just imagine the time and cost savings being able to print these fixtures in-house, in a few hours, while freeing up valuable CNC production time. And, in full color.

The new HP 300|500 series printers will start shipping in Q2 2019 and offer never seen before final use parts in the sub $100k price level AND offer color. It will be exciting to see the new markets and uses this new technology will offer.

Topics: 3D Printing